How to configure STREMIO – “all in one” streaming service

What is Stremio?

Stremio as such is a simple media player and aggregator, but with a little magic and a couple of addons, it turns into a fantastic streaming service that combines all the benefits of other services (Netflix, Hulu, Disney+, Prime, Max, Apple TV+, etc., but also its other content) unavailable on other services).

The interface is similar to Netflix, the quality is available according to your wishes (including 4k DV/HDR), subtitles are available and easy to set, i.e. they are downloaded by default with OpenSubtitles (but other sources can be set as well).

Stremio signup and installation

Register on the site (free) and download the software. The easiest way to do the installation is through Windows software, and after the initial setup, everything will be automatically synchronized with the TV and other devices.

Open the installed Stremio and open Installed Addons (puzzle icon), My Addons, and I recommend deleting everything EXCEPT: Cinemeta, OpenSubtitles V3, Local Files.

Real Debrid signup and registration

Real Debrid is a paid service that is practically necessary for this to work, for the reason that it enables maximum download speeds on movies/series that you start. So with Real Debrid, there is no buffering or problem even with 4k HDR content, of course if your internet is capable enough for the selected quality. In addition, it is used for encryption, that is, the ISP cannot monitor what you do with Internet traffic – this part is admittedly less important in HR, because nothing is checked anyway. But for, say, Germany, it is very important.

register, then go to Premium offers and pay for one of the Premium packages – 6 months cost 16 EUR.

Torrentio installation

Torrentio is an addon for Stremio that is behind the whole story – in combination with Real Debrid, it enables torrents with maximum speeds that you actually download from RD servers and not from peers.

– go to Torrentio Configurator Options: – Providers: ALL SELECTED – Sorting: By quality then seeders – Priority foreign language: if you watch in English, None. If you want another language, select it here – Exclude qualities/resolutions: I ticked Cam, Screener, 480p and 3D. If you have slow internet or a worse TV, feel free to click and say 4k, and/or Dolby Vision, HDR. – Max results per quality. All results – Video size limit: No limit – Debrid provider: select REAL DEBRID – enter the Real Debrid API key (if you are logged in to RD and have Premium, you can find it at: RD API token) – Debride options: select the first two – press Install, confirm. The Stremio app opens and the Addon is installed.

Additional Addon – CyberFlix – catalog organizer

  • This is, for example, a basic addon for organizing the Stremio homepage. It will show, depending on the settings, eg Netflix movies popular, Netflix movies new, Netflix Series popular, Netflix series new, etc. – go to CyberFlix configurator, press Setup – select the catalogs you want, according to your preferences, press Next – on the next page, you can drag and drop to reorder them, that is, decide the order in which they will be displayed – on the next page, enter the RPDB API Key – t0-free-rpdb – this will add the IMDB/Rotten Tomatoes/MetaCritic rating to most movies/series from the catalog. Extremely useful – and finally, click Install, confirm.

And that’s the end of the basic setup. All possible content at a negligible price. I hope that the instructions will be of help to someone, I have already transferred half of my family and friends to this and they are all delighted.

this was the basic instruction, there are all kinds of other possibilities, additional addons and customization. For example, I use integration with Trakt (a platform for watching and rating movies/series) and various dynamic lists (recommendations based on my ratings/favorite movies and series, Watchlist, top 10 movies of the week, Latest TV shows, etc.). If there is a need/interest, I can talk a little about that. There are also all kinds of addons for, for example, porn, Youtube, certain Live channels, etc., but I haven’t used them yet.

P.S. The link for Real Debrid is my referral link, so there you go, thx for the support if you register through it. I get 5 days free per person for the first premium registration.

How to set up a LAMP development environment on Windows Subsystem for Linux (WSL)


The Windows Subsystem for Linux lets developers run GNU/Linux environment — including most command-line tools, utilities, and applications — directly on Windows, unmodified, without the overhead of a virtual machine.


Install the Windows Subsystem for Linux

Before installing any Linux distros for WSL, you must ensure that the “Windows Subsystem for Linux” optional feature is enabled.
Open PowerShell as Administrator and run:

Enable-WindowsOptionalFeature -Online -FeatureName Microsoft-Windows-Subsystem-Linux

Restart your computer when prompted.

Install your Linux Distribution of Choice

Open the Microsoft Store and choose your favorite Linux distribution.
Once your distro has been downloaded and installed, you’ll need to complete initialization of the new distro.

Launch a new instance , wait a few minutes until instalation is finished and then you will be prompted to create a new user account (and its password).

Installing an Apache HTTP server

First update your package catalog and upgrade your installed packages:

sudo apt update && sudo apt upgrade

Install Apache2

sudo apt install apache2

Create a project folder for your web applications. This folder should be outside of the WSL filesystem. Please replace WINUSER with your Windows username.

sudo mkdir /mnt/c/Users/WINUSER/Workspace

Create a symbolic link to the selected folder:

sudo ln -s /mnt/c/Users/WINUSER/Workspace /var/www/html/

Open the Apache default virtual host configuration file:

sudo nano /etc/apache2/sites-enabled/000-default.conf

Modify file with following:

<VirtualHost *:80>
        ServerAdmin webmaster@localhost
        DocumentRoot /var/www/html/Workspace

        ErrorLog ${APACHE_LOG_DIR}/error.log
        CustomLog ${APACHE_LOG_DIR}/access.log combined

        <Directory /var/www/html>
         Options Indexes FollowSymLinks
         AllowOverride All
         Require all granted
        </Directory>
</VirtualHost>

Enable mod rewrite and restart apache2 server

sudo a2enmod rewrite
sudo service apache2 restart

Installing the MariaDB server

Install MariaDB server:

sudo apt-get install mariadb-server

You wont be asked for password, default root user doesn’t have password in MariaDB. Start server and run a simple security script. During execution you can choose root password.

sudo service mysql start
sudo mysql_secure_installation

Installing PHP

Install PHP and helper packages and restart apache2 after installation is finished:

sudo apt install php libapache2-mod-php php-mysql php-mbstring php-gettext php-xml php-json php-curl php-zip php-soap

Installing PHPMyAdmin

Install PHPMyAdmin and after installation ends enable mbstring mod and restart apache2 server

sudo apt-get install phpmyadmin
sudo phpenmod mbstring
sudo service apache2 restart

Change PHP version on Apache

You can install multiple PHP versions on your system and switch PHP version between them.

Example:

The PHP 5.6 is set as default version in your system, and you need to switch to PHP 7.2. Run the following commands to switch for Apache and command line.

sudo a2dismod php5.6
sudo a2enmod php7.2
sudo service apache2 restart

sudo update-alternatives --set php /usr/bin/php7.2
sudo update-alternatives --set phar /usr/bin/phar7.2
sudo update-alternatives --set phar.phar /usr/bin/phar.phar7.2
sudo update-alternatives --set phpize /usr/bin/phpize7.2
sudo update-alternatives --set php-config /usr/bin/php-config7.2

PHP 7 on Ubuntu 14

sudo apt-get install software-properties-common

sudo apt-get -y update
sudo add-apt-repository ppa:ondrej/php
sudo apt-get -y update
sudo apt-get install -y php7.0 libapache2-mod-php7.0 php7.0 php7.0-common php7.0-gd php7.0-mysql php7.0-mcrypt php7.0-curl php7.0-intl php7.0-xsl php7.0-mbstring php7.0-zip php7.0-bcmath php7.0-iconv
sudo a2enmod php7.0 (sudo a2dismod php5 if needed)
sudo service apache2 restart

Linux commands

Database dump: mysqldump -uUSERNAME -pPASSWORD DATABASE > backup.sql

Database import: mysql -uUSERNAME -pPASSWORD DATABASE < backup.sql

Change language :  nano /etc/default/locale

Check server version: lsb_release -a

Check php version: php -v

Git new branch: git checkout -b master origin/master

Magento 2 upgrade

If Magento 2 version is 2.0.x we first have to apply patch MDVA-532!

We can upgrade through command line interface (CLI) or with Magento “Web Setup Wizard”.

CLI upgrade:

composer require magento/product-community-edition 2.1.0 --no-update
composer update
rm -rf var/cache/* var/page_cache/* var/generation/*
php bin/magento setup:upgrade

Visit the homepage to see your updated Magento 2. If you get some errors, reset file permissions and ownership and then clean cache.

Offical documentation: http://devdocs.magento.com/guides/v2.0/comp-mgr/cli/cli-rc1-samp.html

Web Setup Wizard:
1. Go to: System > Web Setup Wizard > System upgrade
(If asked, enter your authentication keys in the provided fields and save.)
2. Select desired version and click next
3. readiness check
4. choose backup or not
5. click Upgrade and wait

Offical documentation: http://devdocs.magento.com/guides/v2.0/comp-mgr/upgrader/upgrade-start.html

Visit the homepage to see your updated Magento 2. If you get some errors, reset file permissions and ownership and then clean cache.

Magento sales emails cron job setup

Troubles with magento sales emails?

If you are having troubles with Magento sales emails not being sent to your customers, you just need to set/check up on CRON job on your server to see if it is working properly.Starting with Magento 1.9.1 the emails are not being sent directly during checkout but instead are being queued. The queue is being processed via your Magento cronjob.

In this article I will describe how to setup cron jobs in CPanel and via SSH. Setup is very similiar and if you have any other access it would be very likely to this two.

Setup cron job via SSH

Before setting up a new cronjob, please make sure the Magento cronjob (a cron running cron.php) hasn’t been set up yet. Use the following command to get the currently installed cronjobs:

crontab -l

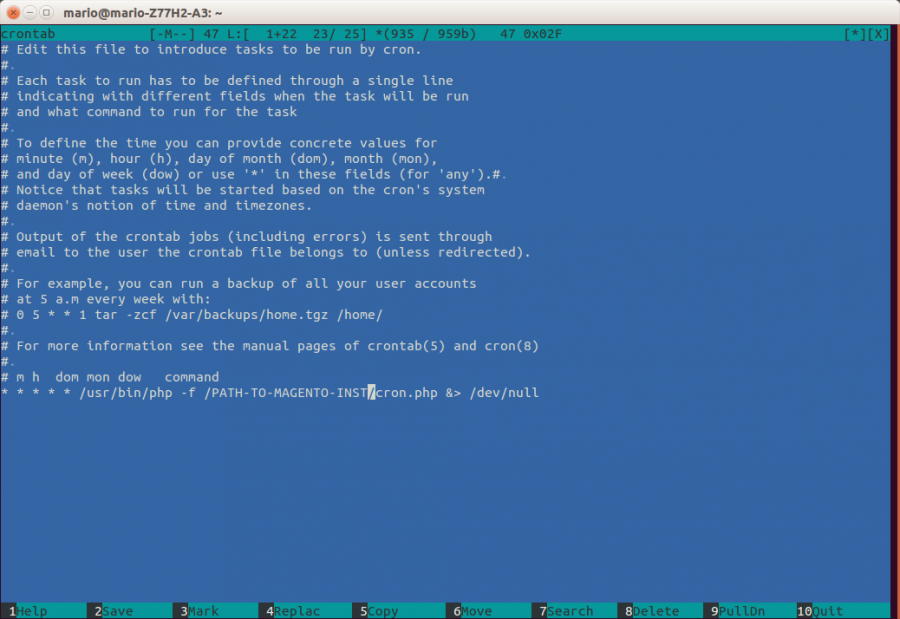
If the cronjob hasn’t been set up yet, you will need to open the crontab file to set up the cronjob. The crontab manages which and when cronjobs are run on the server.

crontab -e

Enter the following line and replace PATH_TO_MAGENTO_INST with real path to directory of your Magento installation and PATH_TO_PHP with path to your php installation:
*/5 * * * * PATH_TO_PHP -f /PATH_TO_MAGENTO_INST/cron.php &> /dev/null

You can find PHP installation path with command <code>which php</code>.

Save file and you will get message crontab: installing new crontab. And then check once again with crontab -l.


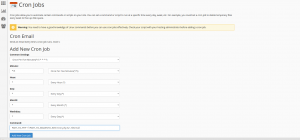
Setup cron job via CPanel

Find Cron Jobs settings in your panel (Advanced -> Cron jobs) and first check that it has not been set up yet. Now add new cronjob with following parameters and click on button to finish

magento sales email cronjob setup in cpanel


Now when you setup cron job either cpanel or SSH way, you just have to wait for emails 🙂

If you have installed cronjob, but still have problems with cron or not sure if cron is running, try to install a free extension AOE Scheduler. This extension can show you the status of cron and cron tasks including a timeline view. And dont forget that Magento recommends running cron every minute for EE and every five minutes for CE.

Shopware 5 open source e-commerce software

Overview

Shopware 5 is a powerful and flexible application that can be used to build eCommerce experiences. It is an open source eCommerce software developed completely on location in Germany and based on bleeding edge technologies like Symfony 2, Doctrine 2 & Zend Framework. It provides an event-driven plugin system and an advanced hook system, giving you the ability to customize every part of the platform.Shopware is trusted by over 54,000 international online shops—ranging from small business and scaling up to the demands of enterprise.

Shopware Licences

There are four versions: Community, Professional, Professional Plus and Enterprise.

shopware licences

  • Community Edition is the free, open source version and licensed under AGPL. Without compromising quality, the Community Edition makes it possible for tech-savvy online merchants to realize projects with a smaller budget. Upgrades are possible at any time—so Shopware can grow alongside your business.
  • Professional Edition is the ultimate solution for successful online commerce. Feature-rich and protected by manufacturer support, the Professional Edition is perfect for customers looking to grow their business from the bottom up. The platform is modular, expandable and customizable, making it ideal for small to medium-sized businesses.
  • Professional Plus comes as the true all-inclusive package for successful online trading. To encourage the possibilities of your online shop even further, this edition includes every Premium Plugin developed by Shopware as well as support directly from us, the manufacturer.
  • Enterprise is the ideal solution for ambitious eCommerce projects. This is where consultancy, service and performance meet under one platform; powered by the visionary features that make Shopware one of the fastest growing solutions on the market. Here you’ll find everything you need for successful online business.

Shopware Extensions

The Community Store is the one and only marketplace for every Shopware module, interface and extra feature. You can buy them, rent them and many of them are completely free. The plugins help you make your shop even more attractive and to attract many more customers. Also you can easily offer your products to thousands of Shopware merchants

System requirements

  • Linux-based operating system with Apache 2.x web server
  • PHP 5.4 or higher (PHP 5.5 is strongly recommended and PHP 5.6.0 – 5.6.3 are not compatible caused by a session bug)
  • MySQL 5.5 or higher
  • Possibility to set up cron jobs
  • Minimum 4 GB available hard disk space

Installation

Shopware installation is easy and there are two ways to do it.

LAMP Install on Ubuntu – how to

Before we start with LAMP install, many will ask “What is LAMP?”.

LAMP is short for Linux, Apache, MySQL and PHP, an open-source Web development platform, also called a Web stack, that uses Linux as the operating system, Apache as the Web server, MySQL as theRDBMS and PHP as the object-oriented scripting language. Perl orPython is often substituted for PHP. And now when we answered that important question we can start with

LAMP Install – Ubuntu

  1. LINUX
  2. Since we already running Ubuntu, the linux part is taken care of.
    Before starting the installation, make sure your distribution is up to date so open terminal and run command:
    sudo apt-get update
    sudo apt-get upgrade

    whichdownloads the package lists from the repositories and “updates” them to get information on the newest versions of packages and their dependencies. It will do this for all repositories and PPAs.

  3. APACHE
  4. The Apache HTTP Server has been the most popular web server on the public Internet.
    To install apache, open terminal and type in this command:

    sudo apt-get install apache2

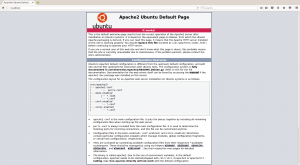
    To check if Apache is installed,Open a web browser and navigate to http://localhost/. You should see a message saying It works! or Apache2 Default page like in picture below

    apache

  5. MySQL
  6. MySQL is a powerful database management system used for organizing and retrieving data

    To install MySQL, open terminal and type in this command:

    sudo apt-get install mysql-server

  7. PHP
  8. To install PHP, open terminal and type in this command:

  9. sudo apt-get install php5 libapache

At the end of LAMP install you have to restart web server. Open terminal and type in this command:
sudo /etc/init.d/apache2 restart

And LAMP install is over! Now you can start your first project on your own web server. 🙂